Create Indian wedding photos for your wedding album with AI. Cute couple poses, traditional wedding dresses like lehenga, saree, bandhgala and sherwani - all customized to your style.
Upload photos and let AI craft your Indian wedding photos. Cute couple poses, traditional wedding dresses like lehenga, saree, bandhgala and sherwani, and wedding hairstyles - all customized to your style. Professional-grade wedding photos, minus the professional price tag. Save time, money, and look amazing - all without an expensive photographer!
Features:
Wedding Photography
Indian Wedding
Bridal Photos
Wedding Portraits
Wedding Sarees
Wedding Album
AI Wedding
Indian Couple Poses
20 photos included
1,200+ photos generated
Desi Wedding
AI Desi Wedding Photo Generator
Create Desi wedding photos for your wedding album with AI. Cute couple poses, traditional wedding dresses like gharara, saree, bandhgala and sherwani - all customized to your style.
Upload photos and let AI craft your Desi wedding photos. Cute couple poses, traditional wedding dresses like gharara, saree, bandhgala and sherwani, and wedding hairstyles - all customized to your style. Professional-grade wedding photos, minus the professional price tag. Save time, money, and look amazing - all without an expensive photographer!
Features:
Wedding Photography
Indian Wedding
Bridal Photos
Mehndi Photos
Wedding Sarees
Wedding Album
Nikah Photos
Desi Couple Poses
20 photos included
1,200+ photos generated
Valentine's Day
AI Valentine's Day Photo Generator
Create romantic Valentine's Day themed photos. Perfect for cards, social media, or capturing love-filled moments with your special someone.
Transform your photos into a romantic Valentine's Day album. From candlelit dinners to rose-filled scenes, let our AI create the perfect backdrop for your love story. Save time, money, and look amazing - no need for an expensive photographer.
Features:
Valentine's Day
Romantic Photos
Love Letters
Couple Portraits
Romance Photography
Heart Theme
Love Story
Special Moments
40 photos included
1,400+ photos generated
Hairstyle
AI Hairstyle Generator
Try different hairstyles and colors before getting a haircut. Perfect for visualizing your next look or exploring new styles.
Explore endless hair possibilities without the scissors. Upload your photo and let our AI show you how you'd look with any hairstyle or color. Save time, money, and look amazing - no need for an expensive photographer.
Features:
hairstyle ideas
wedding hairstyles
wedding guest hairstyles
hairstyle generator
Hair Design
Beauty Photography
Salon Look
20 photos included
1,600+ photos generated
Professional Headshots
AI Professional Headshot Generator
Transform your selfies into picture-perfect professional headshots in minutes. Upload photos, receive headshots for LinkedIn, CVs, and beyond.
Stand out on LinkedIn and attract more job offers with AI-generated professional headshots. Get up to %180 more job offers from hiring managers. Create an AI model of yourself and generate endless headshots—no need for an expensive photographer. Perfect for LinkedIn, CVs, resumes, and beyond.
Features:
ai headshot generator
ai professional headshot
ai headshots
ai professional headshot generator
Linkedin photos
pfp maker
20 photos included
3,600+ photos generated
Wedding
AI Wedding Photo Generator
Create stunning AI-generated wedding photos. Cute couple poses, stunning wedding dresses and wedding hairstyles - all customized to your style.
Upload photos and let AI craft your perfect day. Cute couple poses, stunning wedding dresses and wedding hairstyles - all customized to your style. Professional-grade wedding photos, minus the professional price tag. Save time, money, and look amazing - no need for an expensive photographer.
Features:
Wedding Photography
Save The Date
Bridal Photos
Wedding Portraits
Wedding Planning
Wedding Album
AI Wedding
Couple Poses
20 photos included
1,200+ photos generated
Nature
AI Nature Photo Generator
Generate outdoor and nature photography with AI.Transform your photos into professional adventure shots with beautiful landscapes and natural backdrops. Perfect for travel content and outdoor enthusiasts.
We'll transform your selfies into a gallery of trekking triumphs and camping memories, set against nature's most stunning backdrops. Save time, money, and look amazing - all without an expensive photographer!
Features:
Nature Photography
Outdoor Portraits
Adventure Photos
Travel Photos
Landscape Photography
Scenic Views
Outdoor Adventure
Wanderlust
20 photos included
800+ photos generated
Mafia
AI Mafia Photo Generator
Channel your inner don or donna with these stylish, vintage-inspired photos. Perfect for themed parties or dramatic social media posts.
Step into the golden age of the mafia with gangster-era portraits. From mafia attire to classic mob style, vintage suits, and timeless sophistication - all without an expensive photographer!
Features:
Vintage Photography
Film Noir
1920s Style
Gatsby Era
Classic Portraits
Dramatic Portraits
Stylized Portraits
Noir Style
20 photos included
950+ photos generated
Cyberpunk
AI Cyberpunk Photo Generator
Dive into the vibrant world of neon-lit cityscapes and cyberpunk aesthetics. Ideal for futuristic themes or eye-catching digital art.
Step into a cyberpunk world with AI-generated futuristic photos! From neon-lit cityscapes to high-tech fashion, create stunning sci-fi portraits and dystopian aesthetics. Experience AI cyberpunk photography like never before—all without an expensive photographer!
Features:
Cyberpunk
Urban Photography
Neon Art
City Lights
Digital Art
Future Fashion
Night Life
Tech Aesthetic
20 photos included
2,200+ photos generated
Holiday 🏖️
AI Holiday Photo Generator
Capture the magic of the holiday season with these festive themed photos. Great for cards, decorations, or spreading holiday joy.
Create stunning holiday photos with AI! From beach vacations to Christmas market strolls, transform your selfies into professional travel photography. Capture honeymoon memories, family holiday pictures, and romantic getaways—all without an expensive photographer!
Features:
Holiday Photos
Christmas Cards
Winter Wonderland
Family Portraits
Seasonal Photography
Holiday Magic
Festive Photos
Season's Greetings
20 photos included
1,500+ photos generated
Engagement
AI Engagement Photo Generator
Celebrate love with these romantic engagement-themed photos. Perfect for announcements, invitations, or capturing special moments.
Turn your selfies into professional engagement photos and romantic pre-wedding pictures in just minutes. DreamShootAI lets you explore couple poses and gorgeous hairstyles. Save time, money, and look amazing - no need for an expensive photographer.
Features:
Engagement Photos
Proposal Pictures
Couple Portraits
pre-wedding photos
Ring Photos
save the date
Romance Photos
Perfect Proposal
20 photos included
1,100+ photos generated
Boudoir
AI Boudoir Photo Generator
Create tasteful and artistic couple boudoir photos. Ideal for private collections or exploring intimate photography.
Experience the art of erotic photography and a sexy photo shoot from the privacy of your home. Try AI lingerie and explore stunning looks—no need for an expensive photographer. Save time, money, and look amazing - no need for an expensive photographer.
Features:
Boudoir Photography
Intimate Portraits
Couple Photos
Artistic Photography
Romantic Pictures
Anniversary Photos
Private Session
Sensual Photography
20 photos included
750+ photos generated
Gala Photos
AI Gala Photo Generator
Generate sophisticated high-class party scenes. Perfect for event planning, invitations, or visualizing elegant gatherings.
From designer gowns and to elegant tuxedos. Upload photos and our AI creates stunning, paparazzi-worthy shots of you two owning the night at the most exclusive galas and balls. Save time, money, and look amazing - no need for an expensive photographer.
Features:
Gala Photos
Luxury Events
Red Carpet
Black Tie
Fashion Photography
Formal Events
High Society
Glamour Shots
20 photos included
1,300+ photos generated
Christmas Couple
AI Christmas Couple Photo Generator
Create magical Christmas couple photos with AI. Romantic moments under the mistletoe, cozy fireplace scenes, snowy winter wonderland portraits perfect for holiday cards.
Make this holiday season unforgettable with DreamShootAI, the premier AI Christmas photo generator for couples and families. Whether you are looking for romantic Christmas couple pictures under the mistletoe or personalized AI holiday photos for your digital cards, our advanced models deliver studio-quality results in seconds. Generate your custom AI Christmas album today and capture the magic of the season with just a few clicks.
Features:
Christmas Photos
Couple Photos
Holiday Cards
Romantic Christmas
Winter Wonderland
Mistletoe Photos
Christmas Portraits
Festive Couple
40 photos included
850+ photos generated
Christmas Photos
AI Christmas Photo Generator
Generate stunning AI Christmas photos with Santa outfits, winter scenes, festive backgrounds and holiday magic. Perfect for cards, gifts, and social media.
DreamShootAI, Worlds's best AI Christmas photo generator. Skip the expensive studio and create realistic AI Christmas photos from the comfort of your home. Whether you are looking for a whimsical AI Christmas portrait in a snowy wonderland, or personalized AI holiday photos for your digital cards, generate your custom AI Christmas album today and capture the magic of the season with just a few clicks.
Features:
Christmas Photos
Holiday Photos
Santa Photos
Winter Photos
Christmas Cards
Festive Photos
AI Christmas
Holiday Magic
40 photos included
1,200+ photos generated
February 10, 2026
How to Fix an Overexposed Photo: A Pro's Guide
Blown-out highlights? Learn how to fix an overexposed photo with practical techniques for RAW and JPEG files using desktop, mobile, and AI-powered tools.
You've captured a moment, but the final image is a washed-out, overly bright disappointment. This is overexposure, a common photographic pitfall that occurs when too much light floods your camera's sensor, effectively erasing detail in the brightest parts of the image.
Before you touch a single editing slider, a crucial diagnostic step is required. This initial assessment determines whether you're facing a simple fix or an unsalvageable file, a process that can save photographers significant time and cost—a critical factor given that 40% of professional photographers in the U.S. reported increased business costs in 2024, according to a Shootproof industry report.
Diagnosing Overexposure Before You Edit
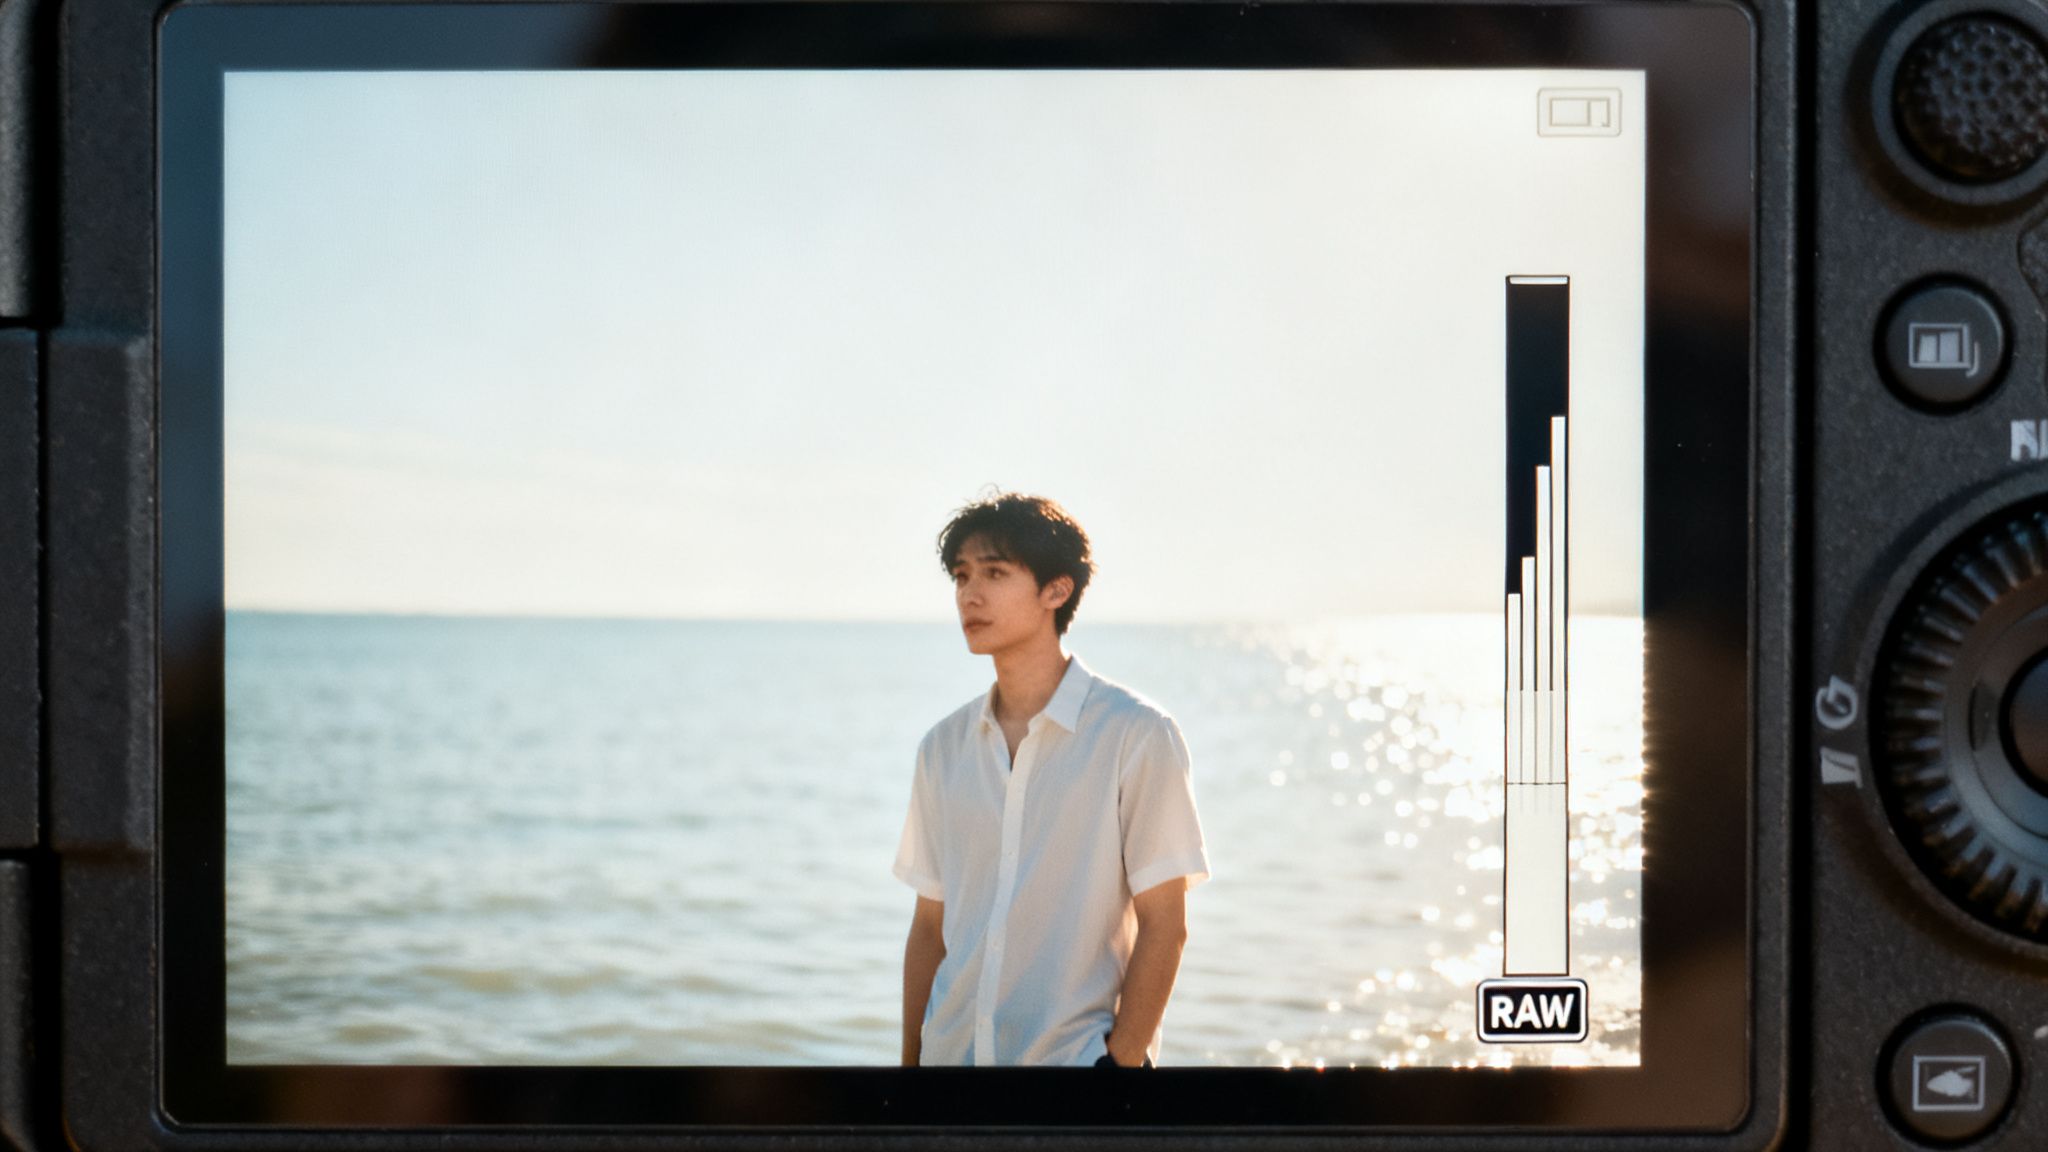
Your primary diagnostic tool is the histogram. This seemingly complex graph is simply a visual representation of your photo's tonal range, with pure black on the far left and pure white on the far right.
In a classic case of overexposure, the graph will be heavily skewed to the right, often with a prominent spike jammed against the edge. This is the definitive red flag indicating a potential loss of data.
Identifying Clipped Highlights
That spike on the right signifies clipped highlights. Clipping is the point of no return where pixels are so overexposed they're recorded as pure white, leaving zero detail, texture, or color information to recover. All that visual data is gone.
Renowned photographer and educator Scott Kelby states, "When you overexpose the highlights... that detail is gone forever. There is no getting it back."
This is where your file format becomes the most critical factor in image recovery. In a program like Lightroom, reducing the exposure by one or two stops can restore significant detail in moderately overexposed areas, but only if you shot in RAW. For more on this, check out the fantastic tutorials over at ProEdu.
The Power of Shooting in RAW
Shooting in RAW format is the single most effective safeguard against irreversible overexposure. A RAW file acts as a digital negative, containing a massive amount of uncompressed data directly from the camera's sensor, which provides unparalleled editing flexibility.
RAW Files: These capture 12 to 14 bits of tonal data, creating a deep well of information that allows you to recover blown-out skies or bright reflections with surprising accuracy.
JPEG Files: These are compressed to 8 bits. The camera makes permanent editing decisions, discarding a significant amount of the original sensor data to produce a smaller, shareable file. This compression makes recovering clipped highlights nearly impossible.
This distinction is not trivial; an 8-bit JPEG can display 16.7 million colors, whereas a 14-bit RAW file can render over 4 trillion colors, providing exponentially more data for recovery.
RAW vs JPEG Recovery Potential At a Glance
Feature
RAW
JPEG
Color Depth
12-14 bit (trillions of colors)
8-bit (16.7 million colors)
Dynamic Range
Very high
Limited
Highlight Recovery
Excellent potential
Very poor to none
White Balance
Fully adjustable
"Baked in"
File Size
Large
Small
Flexibility
Maximum
Minimal
Simply put, a RAW file offers a robust chance at recovery; a JPEG rarely does. Understanding this is foundational to any repair work. For a deeper dive, take a look at our comprehensive guide on how to fix lighting in photos.
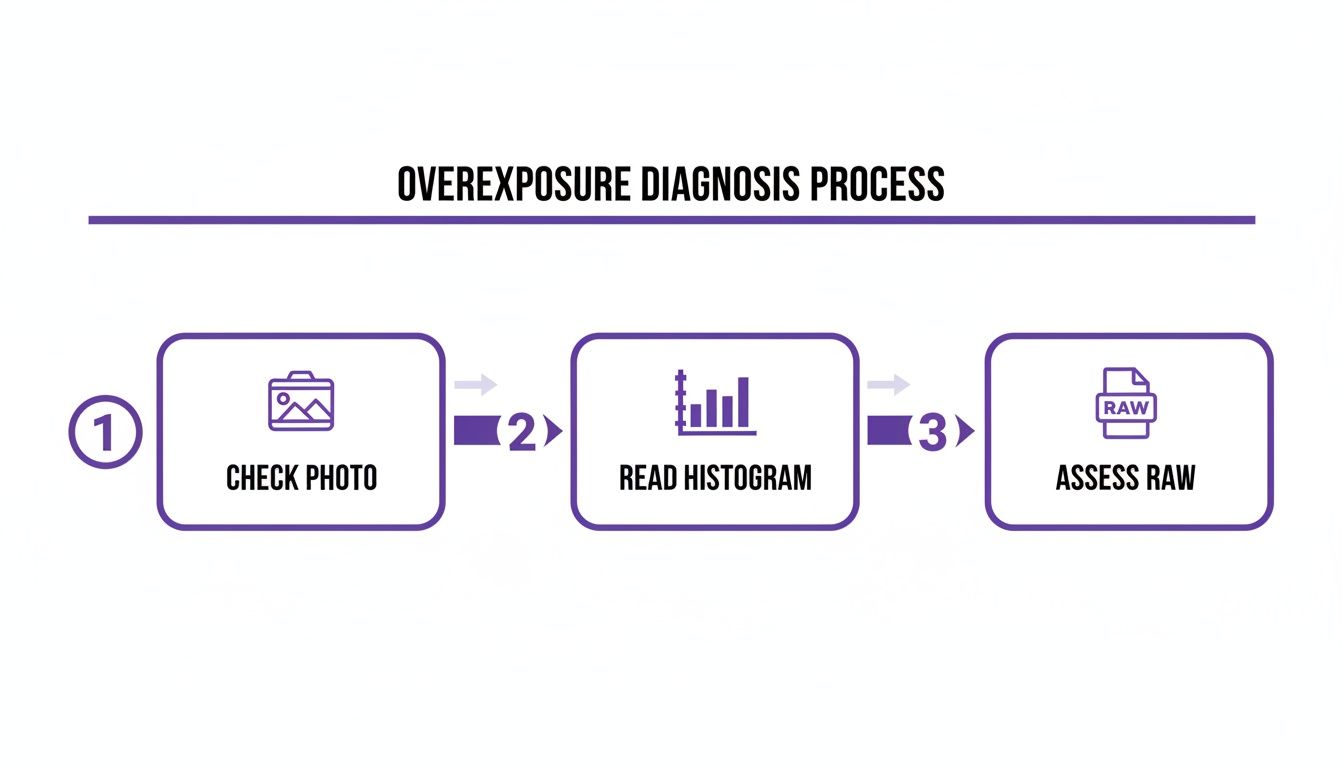
Here’s a simple way to think about your diagnostic process:
By quickly glancing at the image, checking the histogram for clipping, and knowing your file type, you can build a smart editing plan from the get-go.
Mastering Sliders in Desktop Photo Editors
With your RAW file loaded into a professional editor like Lightroom or Capture One, the first instinct is to yank down the main Exposure slider. Resist this urge. A more nuanced approach yields far more natural and professional results.
Consider a classic challenge: an outdoor wedding portrait where the bright sun has blown out the intricate lace details of a white dress. A crude reduction in overall exposure would render the entire scene dark and muddy, stripping it of its vibrancy.
Here, the Highlights slider is your primary tool. It is engineered to target only the brightest areas of the image, leaving mid-tones and shadows untouched. By carefully lowering this slider, you can often miraculously restore the lost texture in the dress, revealing the fine patterns you thought were gone forever.
Fine-Tuning with Whites and Shadows
After taming the highlights, the image may appear flat or grayish. This is a normal byproduct of the recovery process. Now, introduce the Whites slider. Think of it this way: the Highlights slider recovers detail, while the Whites slider sets the absolute brightest point in your photo. A subtle, precise adjustment here will reintroduce a clean, crisp pop without re-clipping the highlights.
Simultaneously, assess the darker areas. Pulling down highlights can sometimes crush the shadows, making them look unnaturally dense. A slight boost with the Shadows slider will lift these areas, reintroducing crucial depth and dimension to the scene. It's a delicate balancing act.
As professional photographer Nik Bhatt of Gentlemencoders points out, editing software is getting smarter all the time. He notes that an “Improved Auto Enhance algorithm with less vibrancy and better handling of overexposed images” is a huge focus for developers, making our jobs easier.
Adding Precision with the Tone Curve
For the ultimate level of control, the Tone Curve is indispensable. This tool allows for surgical adjustments to specific brightness levels. Even after balancing the basic sliders, an image can lack the punchy contrast that signifies a professional edit.
The classic technique is to create a gentle 'S-curve':
Place a point in the lower third of the curve and drag it down slightly to deepen the shadows.
Add another point in the upper third and pull it slightly upward to brighten the highlights.
This simple maneuver introduces a beautiful, natural-looking contrast that basic sliders cannot replicate. For many photographers, this is the final, essential step to a professional-grade recovery. You aren't just dimming the light; you're reshaping it. To go deeper, exploring various photo editing techniques can provide a richer understanding of these powerful tools.
Just as these sliders rescue an overexposed shot, desktop editors are packed with tools for other common problems. For instance, you can also learn how to improve low resolution photos using features within the same software. Once you master these fundamentals, you’ll have the confidence to save images that others might have already given up on.
Advanced Recovery: Local Adjustments & Exposure Blending
Sometimes, the main exposure and highlight sliders just won't cut it. You’ve pulled them all the way down, but that bright sky is still a flat, white mess while the rest of your photo is getting too dark. What now?
For severely overexposed or high-contrast scenes, you must transition from global fixes to surgical intervention. This is where professionals turn to advanced tools like local adjustments and exposure blending to fix specific problem areas without degrading the rest of the image.
Pinpoint Repairs with Local Adjustments
Think of local adjustments as your secret weapon for reclaiming lost detail. Instead of applying a single, global change to the entire photo, you can "paint" or precisely place your edits exactly where they're needed.
Nearly every modern photo editor, from Lightroom to Capture One, has a powerful set of these tools:
Adjustment Brush: This is your go-to for anything with an irregular shape. You can literally paint over a bright patch on someone's face or a distracting reflection on a car window to selectively tone it down.
Linear (Gradient) Filter: A lifesaver for landscape photographers. When the sky is way brighter than the foreground, this tool lets you drag a gradient down from the top, smoothly darkening the sky without turning the ground into a muddy mess.
Radial Filter: Perfect for drawing attention. You can place a circle or oval over your subject and then darken everything outside of it, creating a natural vignette that pulls the viewer's eye right where you want it.
The real power comes from layering these adjustments. You could use a gradient filter to bring back the blue in a sky, then grab a brush to dodge a few clouds that got too dark.
Mastering Exposure Blending for Extreme Cases
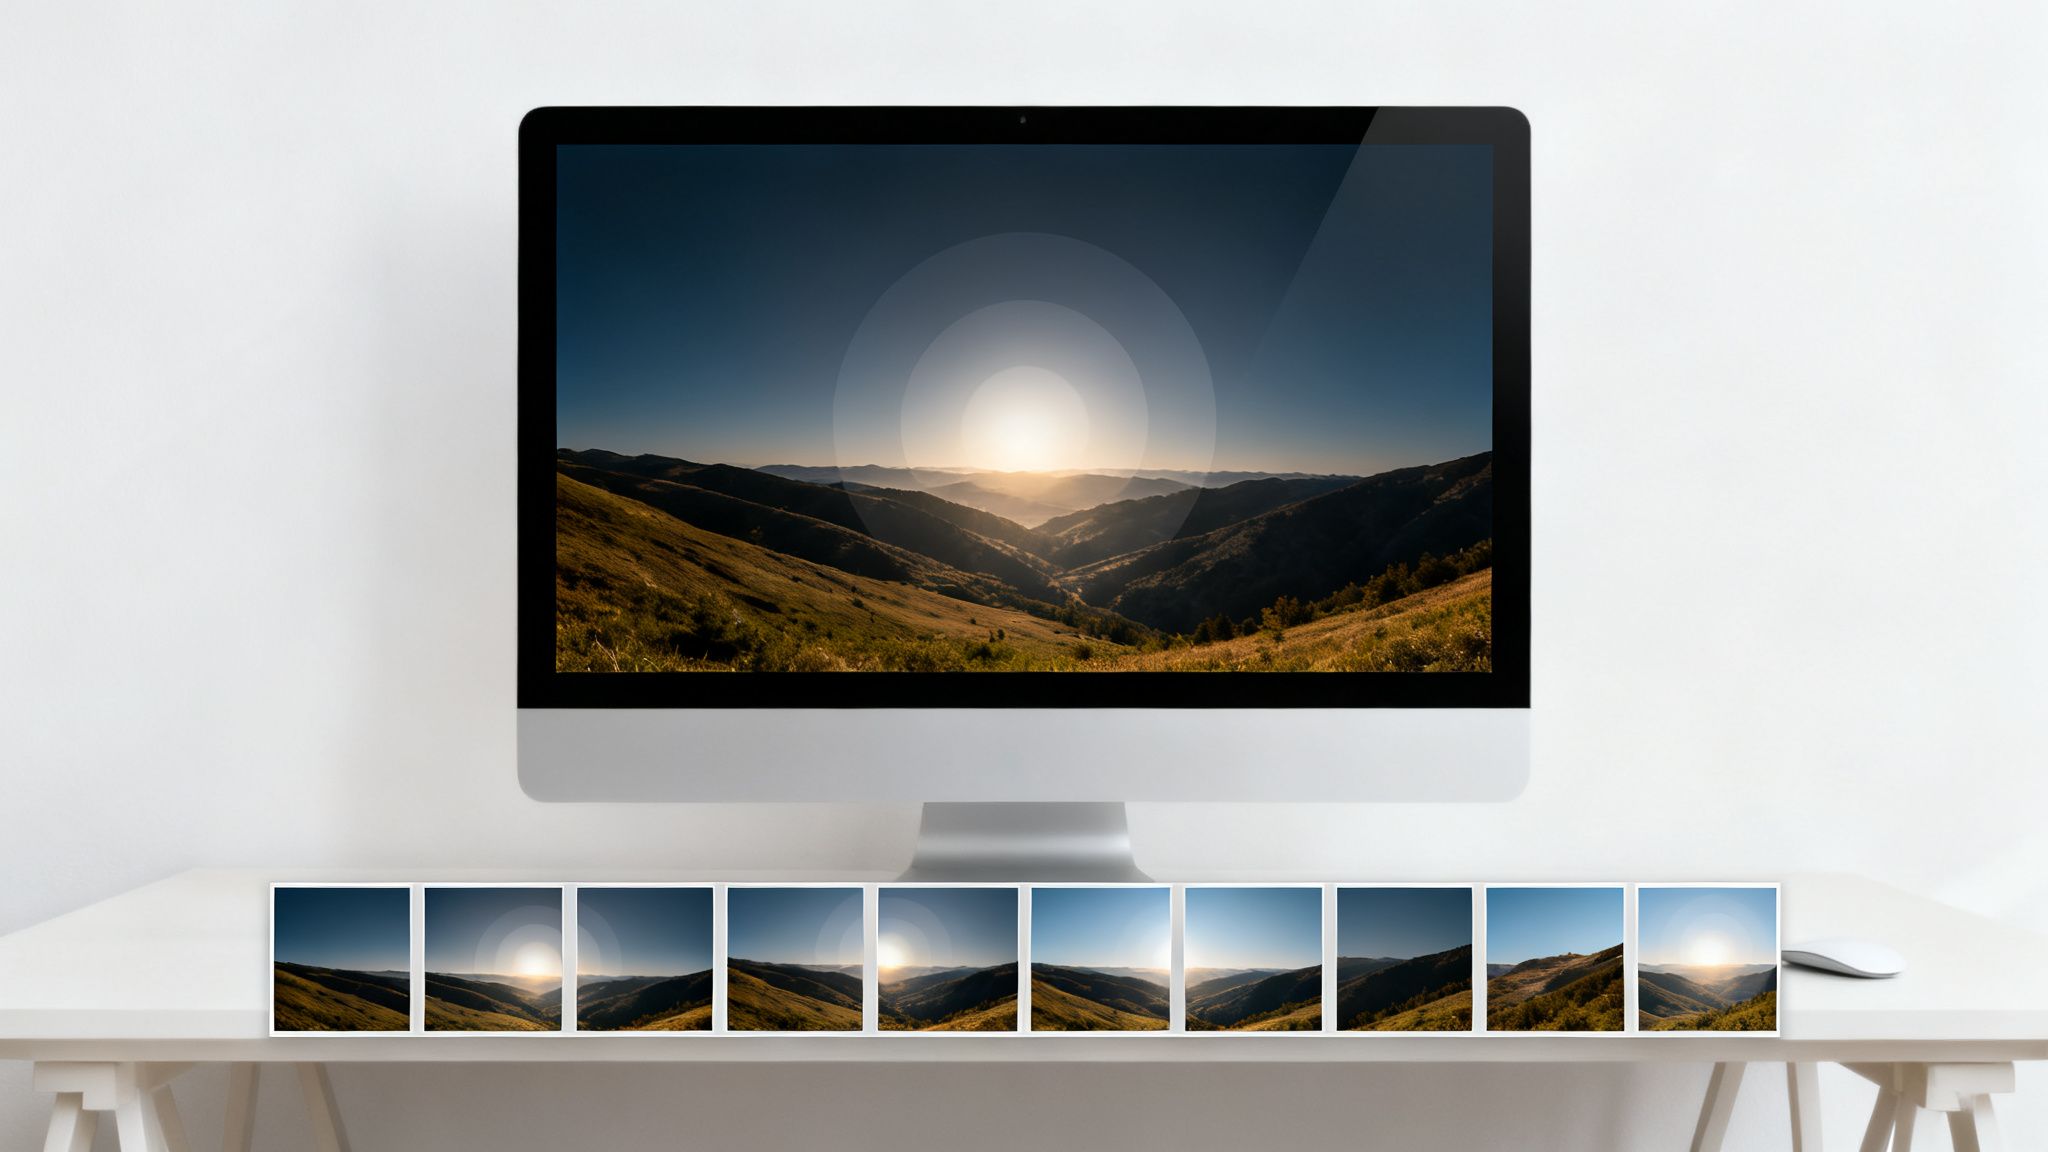
What happens when even a single RAW file can't handle the scene? Think of a fiery sunset over a deep, shadowed canyon—the dynamic range is just too wide. In these moments, photographers rely on a technique called exposure blending (or exposure stacking).
The process starts in the camera by taking multiple photos of the exact same scene at different exposure levels. This is called bracketing. A typical bracketed set includes:
One underexposed shot (to capture all the detail in the bright highlights).
One correctly exposed shot (for the mid-tones).
One overexposed shot (to get clean detail in the darkest shadows).
As professional landscape photographer Audrey Ann points out, simply underexposing one shot to save highlights and then cranking up the shadows later makes noise "more visible throughout your image." Blending avoids this problem completely.
After you've captured your bracketed shots, you merge them using software like Adobe Photoshop or specialized HDR programs. The software cleverly takes the best-exposed bits from each photo and stitches them together into one seamless, incredibly detailed image.
You get the perfectly colored sky from the dark shot, the rich foreground from the bright shot, and clean mid-tones from the normal shot. Some studies have found that this method can increase the recoverable dynamic range by over 300% compared to a single RAW file. When you're facing an impossible exposure, this is the ultimate fix.
How AI Tools Can Instantly Fix Overexposed Photos
While manual editing gives you incredible control, let's be honest—it can be a slow, painstaking process. You need a pretty deep understanding of complex tools just to get started. This is where artificial intelligence is completely changing the game, offering powerful and surprisingly simple ways to fix an overexposed photo without that steep learning curve.
The photo editing software market is already exploding, projected to hit $1.5 billion by 2031, according to a report by Allied Market Research, and you can bet AI-driven features are fueling that fire.
These aren't just fancy sliders. Instead of spending an hour wrestling with highlights, shadows, and curves, you can get professional-looking results with just a few clicks or a simple sentence. This shift is making high-quality photo recovery accessible to everyone, not just seasoned pros.
Leveraging AI Prompts for Precise Edits
Picture this: you have an overexposed selfie from a bright day at the beach where the sky and water are just a giant white blob. With an AI tool like DreamShootAI, you can use a feature called Photo Edit by prompt, which lets you give the AI simple, conversational instructions.
You could just type something like, “Fix the overexposed background and make my skin tone look natural.” The AI gets to work, analyzing the image, zeroing in on the problem areas, and applying targeted adjustments all on its own. It's not just faster; this approach can often produce more balanced, natural-looking results than manual guesswork.
As Nik Bhatt of Gentlemencoders notes, an “Improved Auto Enhance algorithm with less vibrancy and better handling of overexposed images” is a huge focus for developers. This inside look confirms the industry's push toward smarter, more intuitive AI solutions that actually understand and correct common photography mistakes.
This method completely opens up photo editing, letting you just describe what you want the final image to look like instead of needing to know the technical steps to get there.
More Than Just Resolution: Magic Upscalers
But AI's role goes way beyond simple commands. Tools like the Magic Upscaler in DreamShootAI do more than just make your image bigger. They perform a deep analysis of the photo's content, intelligently correcting lighting and exposure issues as part of the enhancement process.
This integrated approach means the AI can:
Reconstruct Lost Detail: It intelligently fills in the blanks in those blown-out highlights where the data would otherwise be gone for good.
Balance Lighting: The AI automatically adjusts the overall tone and mood to create a much more natural and visually pleasing image.
Enhance Colors: It can bring back the rich, vibrant colors that were washed out by all that excessive light.
All of this positions AI as a powerful partner in your editing workflow. Whether you're a beginner hunting for a quick fix or a professional looking to speed things up, these tools are a compelling alternative to the old way of doing things. If you're new to all this, you can get a great feel for it by exploring an AI photo editor online for free and seeing the results for yourself.
Preventing Overexposure Before It Happens
The best way to fix an overexposed photo? Don’t take one in the first place. I know, I know—easier said than done. But shifting your focus from frantic post-processing to smart in-camera strategy is what separates the pros from the rest. It all boils down to getting cozy with the exposure triangle: aperture, shutter speed, and ISO.
Think of these three settings as working together to manage every bit of light that hits your camera’s sensor. Once you understand how they influence each other, you'll spend way less time trying to salvage blown-out images and more time nailing beautiful shots straight out of the camera.
Nailing Your In-Camera Settings
When you’re shooting in bright, unforgiving sunlight, your camera can easily get overwhelmed with light. Your job is to dial it back, and you’ve got a few powerful tools right at your fingertips.
Bump Up Your Shutter Speed: This is your first line of defense against too much light. A faster shutter speed, like 1/1000s, means the shutter snaps open and shut in a tiny fraction of a second, letting in far less light than a slower speed would.
Close Down Your Aperture: Using a smaller aperture (which means a higher f-number, like f/11 or f/16) physically shrinks the opening in your lens. This not only cuts down on light but also gives you a wider depth of field, keeping more of the scene tack-sharp.
Stick to Your Base ISO: Always keep your ISO as low as it can go, which is typically ISO 100 or 200. Raising the ISO makes your sensor more sensitive to light—exactly the opposite of what you want in a bright environment.
Beyond just the technical settings, a real understanding of light is what will truly elevate your photography. If you're ready to go deeper, mastering lighting techniques will give you incredible control over almost any shooting situation.
The Pro Trick: Exposing to the Right
Once you've got the exposure triangle down, you can start playing with an advanced technique called "Exposing to the Right," or ETTR. The idea is to intentionally make your photo as bright as you possibly can without letting the highlights clip (blow out) on your histogram. This captures the absolute maximum amount of light data your sensor can handle.
"A photo taken with a lower ISO and underexposed will have MORE grain than an image taken with a higher ISO, but correctly (or even over) exposed." - Audrey Ann, Photographer at Live Snap Love
That quote nails a critical concept: it's almost always better to lean towards slight overexposure and pull it back in post than to underexpose and have to battle with nasty digital noise. Modern cameras, with their incredible 14+ EV dynamic range, are built for this.
Shooting in RAW and using the ETTR method gives you the flexibility to recover 2-3 stops of exposure in your editing software. This is a game-changing strategy, especially as powerful tools from companies like Adobe—projected to capture 65% of the $1.5 billion editing market by 2031—offer such robust recovery options. Knowing these little tricks is what keeps you ahead of the curve in an ever-evolving industry.
Your Questions on Overexposure, Answered
Even when you know the ropes, some situations just feel tricky. Let's tackle the most common questions photographers run into when trying to rescue an overexposed shot. I'll give you the straight answers you need to edit with confidence.
Can You Realistically Fix an Overexposed Face?
Yes, but you have to be gentle. The biggest mistake is making skin look flat, gray, or unnatural after you pull back the highlights. Don't just yank down the main exposure slider for the whole image.
Instead, reach for a local adjustment brush. Carefully paint over only the overexposed parts of the face. From there, ease down the highlights and exposure sliders just for that area. You might also notice the skin tone looks a bit off, so add a touch of warmth with the temperature slider and maybe a hint of magenta with the tint slider to bring back that natural, healthy glow. Subtle is the name of the game here.
What Are the Absolute Limits of Photo Recovery?
This all comes down to your file type. For a JPEG, any area that’s pure, blown-out white (what we call a "clipped highlight") has zero information left. It's gone for good. No amount of editing wizardry can bring back detail that was never recorded in the first place.
RAW files, on the other hand, give you a lot more breathing room. You can often recover highlights that are one to two stops overexposed without much trouble. Push it further than that, and you’ll start seeing weird color shifts and digital artifacts creep in. Your histogram is the ultimate referee here; if that graph is slammed hard against the right wall, recovery is going to be a real long shot.
"The moral of the story is: don't be scared of ramping up the ISO to get the exposure right. It’s MUCH better to have a higher ISO number and correctly expose, than use a lower ISO number and underexpose." - Audrey Ann, Photographer at Live Snap Love
Can I Actually Fix Photos on My Phone?
Absolutely. Mobile apps like Adobe Lightroom Mobile and Snapseed are shockingly powerful these days. You get access to all the crucial sliders—exposure, highlights, shadows—and can even use selective adjustment masks, just like on your computer.
While a small phone screen isn't always ideal for super precise work, you can get fantastic results on moderately overexposed shots, especially if you're editing a RAW file you shot on your phone.
Battling overexposure has been a part of photography since the 1830s, but modern digital tools give us an incredible advantage. While JPEGs—which account for about 95% of the 1.9 trillion photos taken each year—lose data in blown highlights, RAW files have a salvage rate of around 80% for exposures under +2EV. This digital safety net is a lifesaver, especially as the U.S. photography industry evolves, with 40% of pros reporting higher costs in 2024 tied to fixing exposure problems. You can dive deeper into the photography industry's latest trends over at Shootproof.com.
Ready to skip the sliders and fix overexposure with a single sentence? Let AI do the heavy lifting. DreamShootAI offers powerful tools like Photo Edit by prompt and the Magic Upscaler to intelligently correct lighting, recover details, and deliver professional results in seconds. Try it for free and see how simple photo recovery can be.
how to fix an overexposed photooverexposure correctionphoto editing tipsrecover highlightsAI photo repair