Create Indian wedding photos for your wedding album with AI. Cute couple poses, traditional wedding dresses like lehenga, saree, bandhgala and sherwani - all customized to your style.
Upload photos and let AI craft your Indian wedding photos. Cute couple poses, traditional wedding dresses like lehenga, saree, bandhgala and sherwani, and wedding hairstyles - all customized to your style. Professional-grade wedding photos, minus the professional price tag. Save time, money, and look amazing - all without an expensive photographer!
Features:
Wedding Photography
Indian Wedding
Bridal Photos
Wedding Portraits
Wedding Sarees
Wedding Album
AI Wedding
Indian Couple Poses
20 photos included
1,200+ photos generated
Desi Wedding
AI Desi Wedding Photo Generator
Create Desi wedding photos for your wedding album with AI. Cute couple poses, traditional wedding dresses like gharara, saree, bandhgala and sherwani - all customized to your style.
Upload photos and let AI craft your Desi wedding photos. Cute couple poses, traditional wedding dresses like gharara, saree, bandhgala and sherwani, and wedding hairstyles - all customized to your style. Professional-grade wedding photos, minus the professional price tag. Save time, money, and look amazing - all without an expensive photographer!
Features:
Wedding Photography
Indian Wedding
Bridal Photos
Mehndi Photos
Wedding Sarees
Wedding Album
Nikah Photos
Desi Couple Poses
20 photos included
1,200+ photos generated
Valentine's Day
AI Valentine's Day Photo Generator
Create romantic Valentine's Day themed photos. Perfect for cards, social media, or capturing love-filled moments with your special someone.
Transform your photos into a romantic Valentine's Day album. From candlelit dinners to rose-filled scenes, let our AI create the perfect backdrop for your love story. Save time, money, and look amazing - no need for an expensive photographer.
Features:
Valentine's Day
Romantic Photos
Love Letters
Couple Portraits
Romance Photography
Heart Theme
Love Story
Special Moments
40 photos included
1,400+ photos generated
Hairstyle
AI Hairstyle Generator
Try different hairstyles and colors before getting a haircut. Perfect for visualizing your next look or exploring new styles.
Explore endless hair possibilities without the scissors. Upload your photo and let our AI show you how you'd look with any hairstyle or color. Save time, money, and look amazing - no need for an expensive photographer.
Features:
hairstyle ideas
wedding hairstyles
wedding guest hairstyles
hairstyle generator
Hair Design
Beauty Photography
Salon Look
20 photos included
1,600+ photos generated
Professional Headshots
AI Professional Headshot Generator
Transform your selfies into picture-perfect professional headshots in minutes. Upload photos, receive headshots for LinkedIn, CVs, and beyond.
Stand out on LinkedIn and attract more job offers with AI-generated professional headshots. Get up to %180 more job offers from hiring managers. Create an AI model of yourself and generate endless headshots—no need for an expensive photographer. Perfect for LinkedIn, CVs, resumes, and beyond.
Features:
ai headshot generator
ai professional headshot
ai headshots
ai professional headshot generator
Linkedin photos
pfp maker
20 photos included
3,600+ photos generated
Wedding
AI Wedding Photo Generator
Create stunning AI-generated wedding photos. Cute couple poses, stunning wedding dresses and wedding hairstyles - all customized to your style.
Upload photos and let AI craft your perfect day. Cute couple poses, stunning wedding dresses and wedding hairstyles - all customized to your style. Professional-grade wedding photos, minus the professional price tag. Save time, money, and look amazing - no need for an expensive photographer.
Features:
Wedding Photography
Save The Date
Bridal Photos
Wedding Portraits
Wedding Planning
Wedding Album
AI Wedding
Couple Poses
20 photos included
1,200+ photos generated
Nature
AI Nature Photo Generator
Generate outdoor and nature photography with AI.Transform your photos into professional adventure shots with beautiful landscapes and natural backdrops. Perfect for travel content and outdoor enthusiasts.
We'll transform your selfies into a gallery of trekking triumphs and camping memories, set against nature's most stunning backdrops. Save time, money, and look amazing - all without an expensive photographer!
Features:
Nature Photography
Outdoor Portraits
Adventure Photos
Travel Photos
Landscape Photography
Scenic Views
Outdoor Adventure
Wanderlust
20 photos included
800+ photos generated
Mafia
AI Mafia Photo Generator
Channel your inner don or donna with these stylish, vintage-inspired photos. Perfect for themed parties or dramatic social media posts.
Step into the golden age of the mafia with gangster-era portraits. From mafia attire to classic mob style, vintage suits, and timeless sophistication - all without an expensive photographer!
Features:
Vintage Photography
Film Noir
1920s Style
Gatsby Era
Classic Portraits
Dramatic Portraits
Stylized Portraits
Noir Style
20 photos included
950+ photos generated
Cyberpunk
AI Cyberpunk Photo Generator
Dive into the vibrant world of neon-lit cityscapes and cyberpunk aesthetics. Ideal for futuristic themes or eye-catching digital art.
Step into a cyberpunk world with AI-generated futuristic photos! From neon-lit cityscapes to high-tech fashion, create stunning sci-fi portraits and dystopian aesthetics. Experience AI cyberpunk photography like never before—all without an expensive photographer!
Features:
Cyberpunk
Urban Photography
Neon Art
City Lights
Digital Art
Future Fashion
Night Life
Tech Aesthetic
20 photos included
2,200+ photos generated
Holiday 🏖️
AI Holiday Photo Generator
Capture the magic of the holiday season with these festive themed photos. Great for cards, decorations, or spreading holiday joy.
Create stunning holiday photos with AI! From beach vacations to Christmas market strolls, transform your selfies into professional travel photography. Capture honeymoon memories, family holiday pictures, and romantic getaways—all without an expensive photographer!
Features:
Holiday Photos
Christmas Cards
Winter Wonderland
Family Portraits
Seasonal Photography
Holiday Magic
Festive Photos
Season's Greetings
20 photos included
1,500+ photos generated
Engagement
AI Engagement Photo Generator
Celebrate love with these romantic engagement-themed photos. Perfect for announcements, invitations, or capturing special moments.
Turn your selfies into professional engagement photos and romantic pre-wedding pictures in just minutes. DreamShootAI lets you explore couple poses and gorgeous hairstyles. Save time, money, and look amazing - no need for an expensive photographer.
Features:
Engagement Photos
Proposal Pictures
Couple Portraits
pre-wedding photos
Ring Photos
save the date
Romance Photos
Perfect Proposal
20 photos included
1,100+ photos generated
Boudoir
AI Boudoir Photo Generator
Create tasteful and artistic couple boudoir photos. Ideal for private collections or exploring intimate photography.
Experience the art of erotic photography and a sexy photo shoot from the privacy of your home. Try AI lingerie and explore stunning looks—no need for an expensive photographer. Save time, money, and look amazing - no need for an expensive photographer.
Features:
Boudoir Photography
Intimate Portraits
Couple Photos
Artistic Photography
Romantic Pictures
Anniversary Photos
Private Session
Sensual Photography
20 photos included
750+ photos generated
Gala Photos
AI Gala Photo Generator
Generate sophisticated high-class party scenes. Perfect for event planning, invitations, or visualizing elegant gatherings.
From designer gowns and to elegant tuxedos. Upload photos and our AI creates stunning, paparazzi-worthy shots of you two owning the night at the most exclusive galas and balls. Save time, money, and look amazing - no need for an expensive photographer.
Features:
Gala Photos
Luxury Events
Red Carpet
Black Tie
Fashion Photography
Formal Events
High Society
Glamour Shots
20 photos included
1,300+ photos generated
Christmas Couple
AI Christmas Couple Photo Generator
Create magical Christmas couple photos with AI. Romantic moments under the mistletoe, cozy fireplace scenes, snowy winter wonderland portraits perfect for holiday cards.
Make this holiday season unforgettable with DreamShootAI, the premier AI Christmas photo generator for couples and families. Whether you are looking for romantic Christmas couple pictures under the mistletoe or personalized AI holiday photos for your digital cards, our advanced models deliver studio-quality results in seconds. Generate your custom AI Christmas album today and capture the magic of the season with just a few clicks.
Features:
Christmas Photos
Couple Photos
Holiday Cards
Romantic Christmas
Winter Wonderland
Mistletoe Photos
Christmas Portraits
Festive Couple
40 photos included
850+ photos generated
Christmas Photos
AI Christmas Photo Generator
Generate stunning AI Christmas photos with Santa outfits, winter scenes, festive backgrounds and holiday magic. Perfect for cards, gifts, and social media.
DreamShootAI, Worlds's best AI Christmas photo generator. Skip the expensive studio and create realistic AI Christmas photos from the comfort of your home. Whether you are looking for a whimsical AI Christmas portrait in a snowy wonderland, or personalized AI holiday photos for your digital cards, generate your custom AI Christmas album today and capture the magic of the season with just a few clicks.
Features:
Christmas Photos
Holiday Photos
Santa Photos
Winter Photos
Christmas Cards
Festive Photos
AI Christmas
Holiday Magic
40 photos included
1,200+ photos generated
December 5, 2025
10 Essential Photo Editing Techniques to Master in 2025
Discover 10 essential photo editing techniques to elevate your images. Learn professional workflows, from color correction to AI-powered retouching.
In an era where visual content is paramount, the ability to transform a standard photograph into a stunning masterpiece is no longer a luxury, it's a necessity. With over 1.4 trillion photos taken annually, according to Rise Above Research, making an image stand out requires a deliberate mastery of professional photo editing techniques. This guide moves far beyond basic filters to provide a comprehensive roundup of 10 essential techniques used by industry experts to create compelling, high-impact visuals. We'll explore the 'how' and 'why' behind each method, providing actionable steps and specific applications for today's advanced AI-powered tools like DreamShootAI.
As acclaimed photographer Ansel Adams famously stated, "You don't take a photograph, you make it." The editing process is where the true artistry begins, allowing you to refine the story your image tells. Whether you're a social media creator needing on-brand content, a professional updating a headshot, or an enthusiast looking to elevate your portfolio, these techniques unlock new levels of creative control. From fundamental adjustments like exposure and color correction to advanced methods such as dodge and burn or selective color grading, you will gain the skills to enhance every detail.
This article breaks down each technique into a practical workflow, complete with before-and-after examples, recommended settings, and common mistakes to avoid. You'll also find quick, copy-and-paste prompts designed for DreamShootAI, enabling you to apply these concepts instantly for wedding shoots, virtual try-ons, or simple background fixes. By understanding these core principles, you can ensure your final images are not just seen, but remembered.
1. Exposure and Levels Adjustment
Mastering exposure and levels is the cornerstone of all photo editing techniques, directly controlling the overall brightness and tonal range of an image. This fundamental process involves adjusting how light is distributed across the photograph, ensuring no crucial details are lost in areas that are too dark (shadows) or too bright (highlights). Proper exposure breathes life into a photo, making it look balanced, professional, and visually compelling.
According to a study published in the Journal of Vision, viewers consistently rate images with balanced exposure as more aesthetically pleasing. This isn't just about making a photo brighter or darker; it's about refining the dynamic range. By manipulating sliders for exposure, highlights, shadows, whites, and blacks, you can recover hidden details, correct shooting errors, and establish a specific mood.
Mini-Workflow: Correcting Exposure
Analyze the Histogram: Before making any changes, check the histogram. A graph skewed to the left indicates an underexposed (dark) image, while one skewed to the right means it's overexposed (bright).
Global Exposure Adjustment: Begin with the main Exposure slider to set the overall mid-tone brightness.
Refine Highlights and Shadows: Pull down the Highlights slider to recover details in bright areas like a wedding dress or a bright sky. Lift the Shadows slider to reveal details in darker parts of the image, such as a groom's suit or a dimly lit background.
Set Anchor Points: Use the Whites and Blacks sliders to define the true white and true black points. This adds contrast and prevents the image from looking flat or washed out.
Expert Insight: "Your histogram is your most honest critic. It doesn't care about the subject, only the light," states award-winning photographer Joe McNally. "Trust it to guide your initial exposure corrections before you move on to creative edits."
DreamShootAI Application:
For a quick and powerful fix, use the Photo Edit by prompt feature. Simply upload your image and use a clear command.
Prompt Example: "Brighten the subject's face without blowing out the highlights in the background of this backlit headshot."
Prompt Example: "Fix the underexposed areas in this concert photo, recovering detail in the shadows while keeping the stage lights from looking too harsh."
This technique is essential for everything from rescuing a dimly lit wedding reception photo to ensuring a professional headshot has perfect, even lighting. If you want to dive deeper into this topic, you can learn more about how to fix dark photos on our blog.
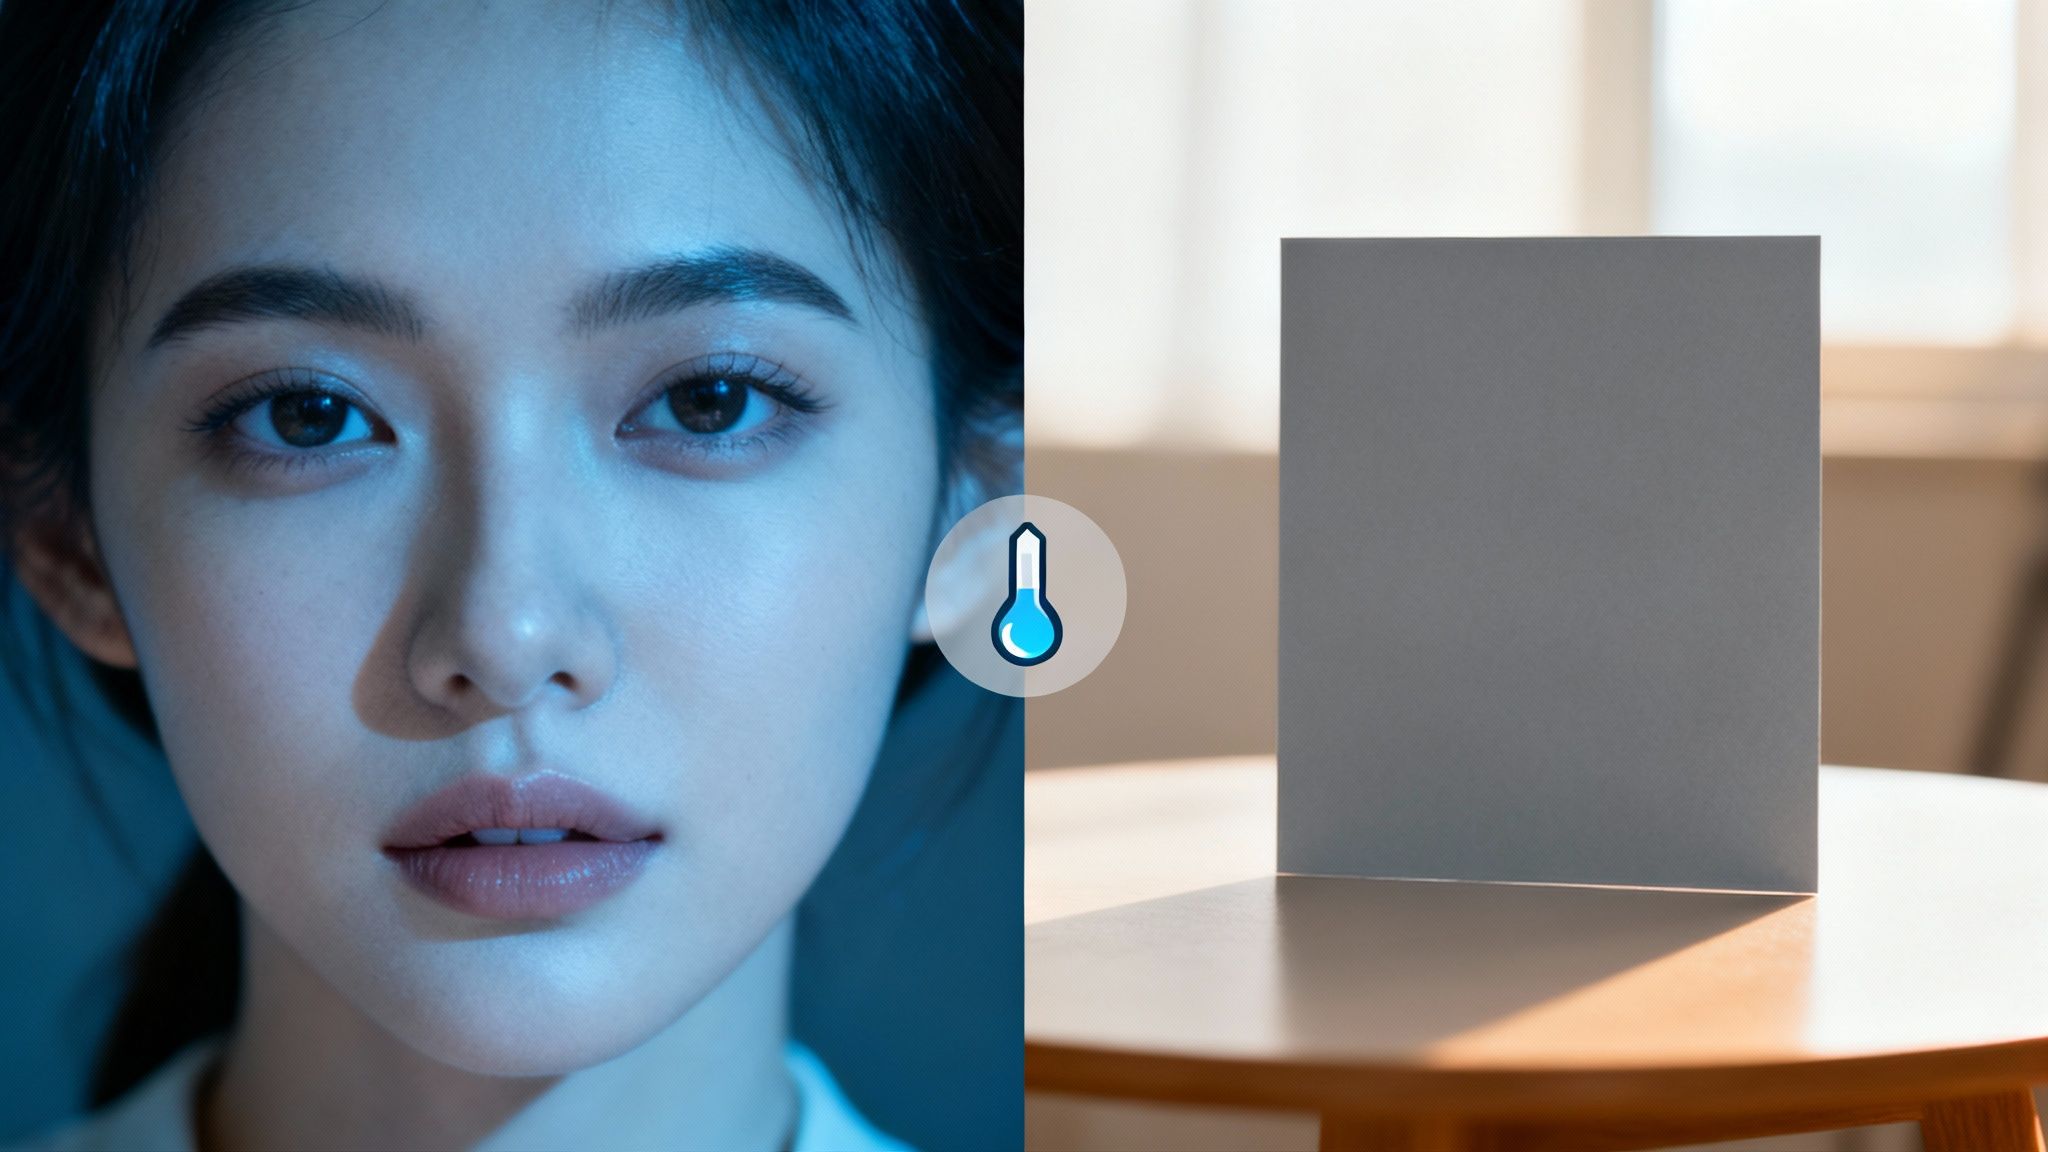
2. Color Correction and White Balance
Accurate color is the soul of a photograph, and mastering color correction and white balance is how you ensure that soul shines through authentically. This essential photo editing technique involves neutralizing unwanted color casts caused by different lighting sources, ensuring that white objects appear white and all other colors are rendered accurately. Proper white balance makes an image look clean, professional, and true to life.
Research from the Munsell Color Science Laboratory at Rochester Institute of Technology confirms that human perception of color is highly sensitive to the surrounding light source. A photo taken indoors under tungsten lighting will have a yellow-orange cast, while one shot in the shade might appear overly blue. By adjusting the Temperature (blue-to-yellow) and Tint (green-to-magenta) sliders, you can counteract these environmental color shifts and achieve a perfect, natural look or intentionally create a specific mood.
Mini-Workflow: Fixing White Balance
Identify the Color Cast: Look at the image to determine if it feels too warm (yellow/orange) or too cool (blue). Also, check for any unnatural green or magenta tints.
Use the Eyedropper Tool: Select the White Balance Eyedropper tool and click on an area of the photo that should be a neutral gray or white. This provides an instant, often precise, correction.
Manual Slider Adjustments: Fine-tune the result using the Temperature slider. Move it towards blue to cool down a warm image or towards yellow to warm up a cool one.
Adjust the Tint: Use the Tint slider to correct any remaining green or magenta casts, ensuring skin tones look natural and healthy.
Expert Insight: "Getting your white balance right in-camera saves time, but understanding how to correct it in post-production is non-negotiable," advises renowned portrait photographer Sue Bryce. "It’s the difference between an amateur snapshot and a professional-grade portrait."
DreamShootAI Application:
Use the Photo Edit by prompt feature for targeted and intuitive color adjustments without touching a single slider.
Prompt Example: "Remove the unnatural yellow cast from this indoor photo and make the colors look natural."
Prompt Example: "Correct the green tint from the fluorescent lights in this office headshot and make my skin tone look healthier."
This technique is crucial for ensuring products look true-to-color in e-commerce shots or making wedding photos feel timeless and authentic. If you want to dive deeper, you can find more information about our AI color correction tools.
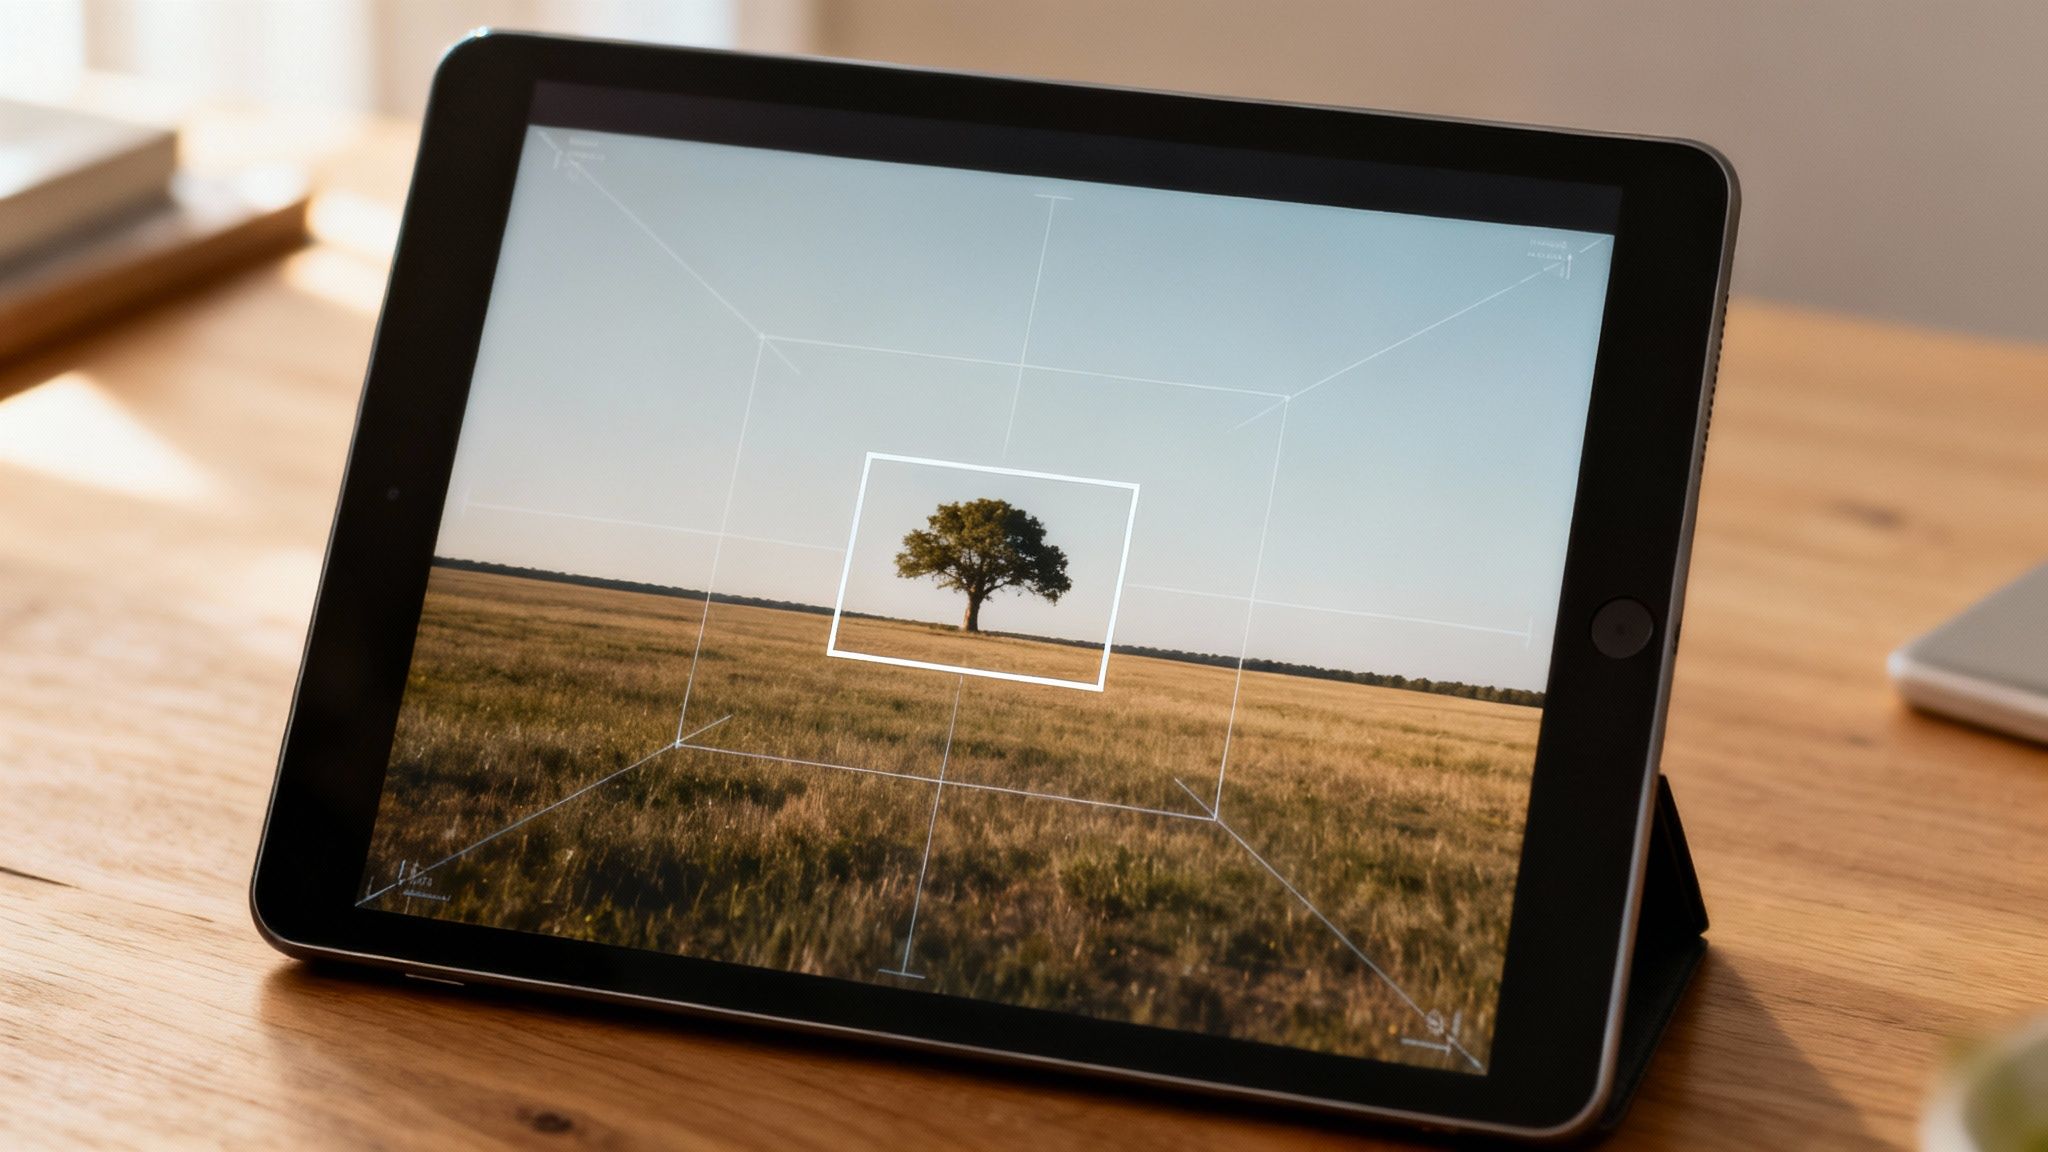
3. Cropping and Composition Refinement
Cropping is one of the most powerful photo editing techniques for transforming a good shot into a great one. It involves strategically removing parts of an image to strengthen composition, eliminate distractions, and guide the viewer's eye directly to the subject. This post-capture adjustment allows you to perfect your framing, applying timeless principles like the rule of thirds or adapting to modern aspect ratios required by social media platforms, thereby enhancing the image's narrative and impact.
Effective cropping is more than just trimming edges; it's a compositional reset. Research from the International Journal of Human-Computer Studies indicates that images following established compositional rules, like the rule of thirds, are perceived as more engaging and balanced. By using cropping tools, you can realign a crooked horizon in a landscape photo, tighten a wildlife shot to emphasize the animal, or reframe a portrait to create a stronger connection between the subject and the viewer.
Mini-Workflow: Refining Composition
Straighten the Horizon: Begin by using the Straighten tool to level any tilted horizontal or vertical lines. A level horizon is fundamental to a balanced landscape or architectural photo.
Activate Grid Overlays: Turn on a compositional grid, such as the Rule of Thirds overlay. This visual guide helps you place key subjects along the lines or at their intersections for a more dynamic composition.
Set the Aspect Ratio: Choose an aspect ratio based on your intended output. Use 1:1 for Instagram posts, 16:9 for video thumbnails or wide displays, or keep the original ratio for printing.
Crop and Recompose: Drag the crop handles to remove distracting elements and reposition your subject. Focus on what adds to the story and remove everything that doesn't.
Expert Insight: "Cropping is not about removing your mistakes; it's about finding the photograph that lives inside the image you shot," advised legendary street photographer Henri Cartier-Bresson. "It’s the final step of composition."
DreamShootAI Application:
Use the versatile Photo Edit by prompt to handle precise compositional adjustments with simple instructions.
Prompt Example: "Crop this photo to a 1:1 square aspect ratio for Instagram, placing the subject's eyes on the upper third line."
Prompt Example: "Straighten the crooked horizon in this beach photo and apply a cinematic 16:9 crop, focusing on the couple in the center."
4. Sharpening and Detail Enhancement
Sharpening is a crucial final step in photo editing techniques that enhances the perceived clarity and definition of an image. It works by increasing the contrast along the edges where different tones meet, making details pop and restoring the crispness that can be lost during the digital capture process. Proper sharpening can transform a good photo into a great one, guiding the viewer's eye and adding a professional polish.
Research from imaging science journals, such as the Journal of Electronic Imaging, confirms that viewers perceive appropriately sharpened images as higher in quality. This isn't about adding new detail, but rather about accentuating the existing detail. Using tools like unsharp mask, clarity, and texture, you can bring out the fine patterns in a fabric, the intricate feathers of a bird, or the rugged textures in a landscape, making the image more engaging and impactful.
Mini-Workflow: Applying Effective Sharpening
Zoom to 100%: Before you begin, zoom in to a 1:1 view. This is the only way to accurately judge the effect of sharpening and avoid creating unwanted artifacts or halos.
Apply a Base Sharpening Amount: Start with a global sharpening tool, like the main Sharpening slider. Begin with a low amount and gradually increase it until details look crisp but not harsh.
Enhance Local Detail: Use the Clarity slider to add mid-tone contrast, which gives the image more punch without affecting the finest details. Use the Texture slider to subtly enhance surface details, perfect for fabrics or foliage.
Use Masking for Precision: The most critical step is masking. Use a Masking slider (often by holding Alt/Option to see the mask) to ensure sharpening is only applied to the edges and textures, not to smooth areas like skies or skin, which can introduce noise.
Expert Insight: "Sharpening should be felt, not seen," emphasizes fine art print master Jeff Schewe. "If you can immediately tell a photo has been sharpened, you’ve gone too far. The goal is to enhance, not to create an artificial, crunchy effect."
DreamShootAI Application:
For targeted and intelligent sharpening, the Photo Edit by prompt feature is ideal. It understands context, allowing you to enhance specific elements precisely.
Prompt Example: "Make the bride's lace veil and the groom's boutonnière look crisp and detailed without making their skin look harsh."
Prompt Example: "Enhance the texture of the weathered wood in this landscape photo, adding sharpness only to the foreground elements."
This technique is the final touch that elevates an image from a simple snapshot to a professional-quality photograph. To better understand how these final adjustments contribute to a polished look, you can learn more about how to edit photos like a professional on our blog.
5. Saturation and Vibrance Adjustment
Controlling the intensity of color is a powerful photo editing technique that can dramatically alter the mood and impact of an image. This is achieved through saturation and vibrance adjustments, which both govern color vividness but in distinct ways. Saturation uniformly increases the intensity of all colors, while vibrance intelligently boosts muted tones while protecting already saturated areas and crucial skin tones from becoming unnatural.
Proper color intensity is a key factor in audience engagement. A study on digital aesthetics published by ACM SIGCHI found that images with vibrant, well-managed colors were perceived as higher quality and held viewers' attention longer. This isn't about creating cartoonishly colorful images; it's about making deliberate choices to enhance the narrative. Whether you're making the turquoise water in a travel photo pop or desaturating a portrait for emotional depth, mastering these tools is essential.
Mini-Workflow: Enhancing Colors Naturally
Prioritize Vibrance: Start with the Vibrance slider. It’s the safer tool, especially for portraits, as it protects skin tones. Increase it gradually to bring life to less saturated colors in the scene.
Add a Touch of Saturation: If needed, add a small, subtle boost with the Saturation slider. Be cautious, as overdoing it can lead to color clipping and a synthetic look.
Use HSL/Color Panel for Precision: For targeted adjustments, navigate to the HSL (Hue, Saturation, Luminance) panel. Here you can selectively boost the saturation of specific colors, like the blues in the sky or the greens in foliage, without affecting the rest of the image.
Check for Color Casts: As you adjust colors, ensure you aren't introducing an unwanted color cast. Keep an eye on neutral areas like whites and grays.
Expert Insight: "Think of Vibrance as a smart-saturation tool. It asks, 'What colors need help?' and gently lifts them," explains fashion photographer Lindsay Adler. "Saturation is a sledgehammer; it boosts everything equally. Ninety percent of the time, the nuanced touch of Vibrance is what you really need."
DreamShootAI Application:
Direct the AI to achieve a specific color mood or correct color issues with a simple command.
Prompt Example: "Make the colors in this travel photo more vibrant and punchy, especially the blue ocean and green palm trees, without making my skin look orange."
Prompt Example: "Apply a cinematic teal and orange color grade to this cityscape photo, enhancing the saturation of blues and oranges while slightly desaturating other colors."
This technique is fundamental for creating eye-catching product photography, stunning landscapes, and emotionally resonant portraits.
6. Dodge and Burn
Dodge and burn is a classic photo editing technique for selectively lightening (dodging) and darkening (burning) specific areas of an image. Originating from traditional darkroom methods, this technique has evolved into a powerful digital tool for enhancing depth, guiding the viewer's eye, and adding dimensionality. By precisely painting light and shadow, you can sculpt your image, making subjects pop and creating a more dramatic, polished final product.
This technique is a cornerstone of professional retouching. A study in the ACM Transactions on Applied Perception confirmed that viewers' eyes are naturally drawn to the brightest and most contrasted parts of an image. Dodge and burn allows you to control this phenomenon, directing focus to a model's eyes in a headshot or emphasizing the dramatic clouds in a landscape. It's the art of adding micro-contrast exactly where it’s needed.
Mini-Workflow: Sculpting with Light
Create Neutral Gray Layers: In your editing software, create two new layers filled with 50% gray and set their blending modes to "Overlay." Name one "Dodge" and the other "Burn."
Select Your Tools: Choose a soft-edged brush. For the "Dodge" layer, set your brush color to white. For the "Burn" layer, set it to black.
Paint with Low Flow: Set the brush Flow or Exposure to a very low value, typically 1-5%. This allows you to build up the effect gradually for a natural look.
Enhance Highlights and Shadows: Gently paint on the "Dodge" layer to brighten existing highlights, like cheekbones or the catchlights in eyes. Use the "Burn" layer to deepen shadows and add contour, such as along the jawline or in the folds of fabric.
Expert Insight: "Dodge and burn isn’t about creating light and shadow that wasn’t there; it's about enhancing what exists," states high-end retoucher Pratik Naik. "Think of yourself as a sculptor, not a painter. Your goal is to reveal form and dimension that is already present in the photo."
DreamShootAI Application:
For targeted and intelligent adjustments, use the Photo Edit by prompt feature to apply this technique precisely.
Prompt Example: "Make the subject's eyes brighter and more captivating in this headshot using a subtle dodge and burn effect."
Prompt Example: "Add more drama to this landscape photo by darkening the sky and brightening the sunlit mountain peaks to make them stand out."
Mastering this technique is key to elevating a flat image into a dynamic, three-dimensional photograph, whether you're enhancing a professional portrait or adding atmosphere to a fashion shoot.
7. Noise Reduction and Clarity
Noise reduction and clarity are powerful photo editing techniques for refining image quality, transforming grainy, low-light shots into clean, crisp visuals. Digital noise, the speckly grain that appears in high-ISO or underexposed photos, can obscure important details. Clarity, on the other hand, strategically enhances mid-tone contrast to add definition and a three-dimensional feel without the harshness of traditional sharpening.
A study from DxOMark, a leading camera sensor testing firm, confirms that higher ISO settings directly correlate with increased image noise, compromising detail and color accuracy. Effective noise reduction algorithms, particularly AI-driven ones, target this unwanted grain while carefully preserving the underlying sharpness and texture of the subject. This dual approach of cleaning up noise and then boosting clarity is essential for everything from restoring dimly lit event photos to making landscape scenes pop with texture.
Mini-Workflow: Balancing Noise and Clarity
Zoom to 100%: Before you begin, zoom into your image to a 1:1 view. This is the only way to accurately judge the amount of noise and the effect of your adjustments.
Apply Luminance Noise Reduction: Start with the Luminance noise slider. This targets the grayscale grain. Increase it gradually until the distracting speckles smooth out, but stop before the image looks overly waxy or plastic-like.
Adjust Chrominance Noise: Next, use the Chrominance (or Color) noise slider. This specifically removes the random color blotches often seen in shadows. You can usually be more aggressive with this setting.
Enhance with Clarity and Texture: Once the noise is controlled, subtly increase the Clarity slider to bring back mid-tone definition. Follow with a small boost in Texture to restore fine details that may have been softened during noise reduction.
Expert Insight: "Noise reduction is a balancing act," cautions astrophotographer Michael Shainblum. "The goal isn't to obliterate every speck of grain, but to reduce its distraction while retaining believable texture. Always apply it before any creative sharpening to avoid amplifying the artifacts you're trying to remove."
DreamShootAI Application:
Use the Photo Edit by prompt feature for intelligent, one-step noise and clarity adjustments.
Prompt Example: "Clean up the digital noise in this indoor concert photo and make the performers on stage look clearer and more defined."
Prompt Example: "Reduce the grain in this astrophotography shot of the Milky Way, then enhance the clarity of the stars to make them stand out."
Mastering this balance is one of the key photo editing techniques for professional results, ensuring your images are both technically clean and artistically impactful.
8. Selective Color Grading and Color Ranges
Selective color grading is one of the most powerful photo editing techniques for creating a specific mood, cinematic feel, or consistent visual style. Unlike basic saturation adjustments, this advanced process involves manipulating the hue, saturation, and luminance of specific colors or tonal ranges (shadows, midtones, and highlights) independently. This precision allows you to infuse an image with emotion, such as adding warm, golden tones for a romantic sunset portrait or cool, desaturated blues for a moody, urban landscape.
A landmark study published in the journal Color Research & Application revealed that color increases brand recognition by up to 80%, a principle that directly applies to photography. A signature color grade makes your work instantly recognizable. By using tools like split-toning to add complementary colors to shadows and highlights (like teal and orange), or by isolating a single color in a black and white image, you can transform a simple photograph into a storytelling masterpiece.
Mini-Workflow: Creating a Cinematic Look
Establish a Base Correction: Begin by balancing the exposure and white balance of your image. A neutral starting point is crucial for accurate color grading.
Use Split-Toning or Color Wheels: Navigate to your software’s color grading panel. Introduce a cool color, like teal or blue, into the Shadows to add depth and a cinematic quality.
Warm the Highlights: Add a complementary warm color, such as orange or yellow, to the Highlights. This often targets skin tones, making them look healthy and vibrant.
Refine with HSL Panel: Use the Hue, Saturation, and Luminance (HSL) sliders for fine-tuning. For example, you can shift the greens toward yellow for an autumnal feel or desaturate blues for a more muted sky.
Expert Insight: "Color grading isn't about changing reality; it's about enhancing emotion," says professional film colorist Stu Maschwitz. "The right palette can turn a static image into a narrative. Start by studying your favorite films and notice how they use color to guide your feelings."
DreamShootAI Application:
The Photo Edit by prompt feature makes complex color grading intuitive and fast. Describe the specific aesthetic you want to achieve.
Prompt Example: "Apply a cinematic teal and orange color grade to this photo, making the shadows cooler and the skin tones warmer."
Prompt Example: "Give this photo a moody, desaturated look with deep greens and muted highlights, similar to a high-fashion editorial."
This technique is essential for brand photography that requires a consistent palette, wedding photos needing a romantic ambiance, and any image where mood is paramount. If you want to see how color impacts visual storytelling, explore our guide on creating thematic photo albums on our blog.
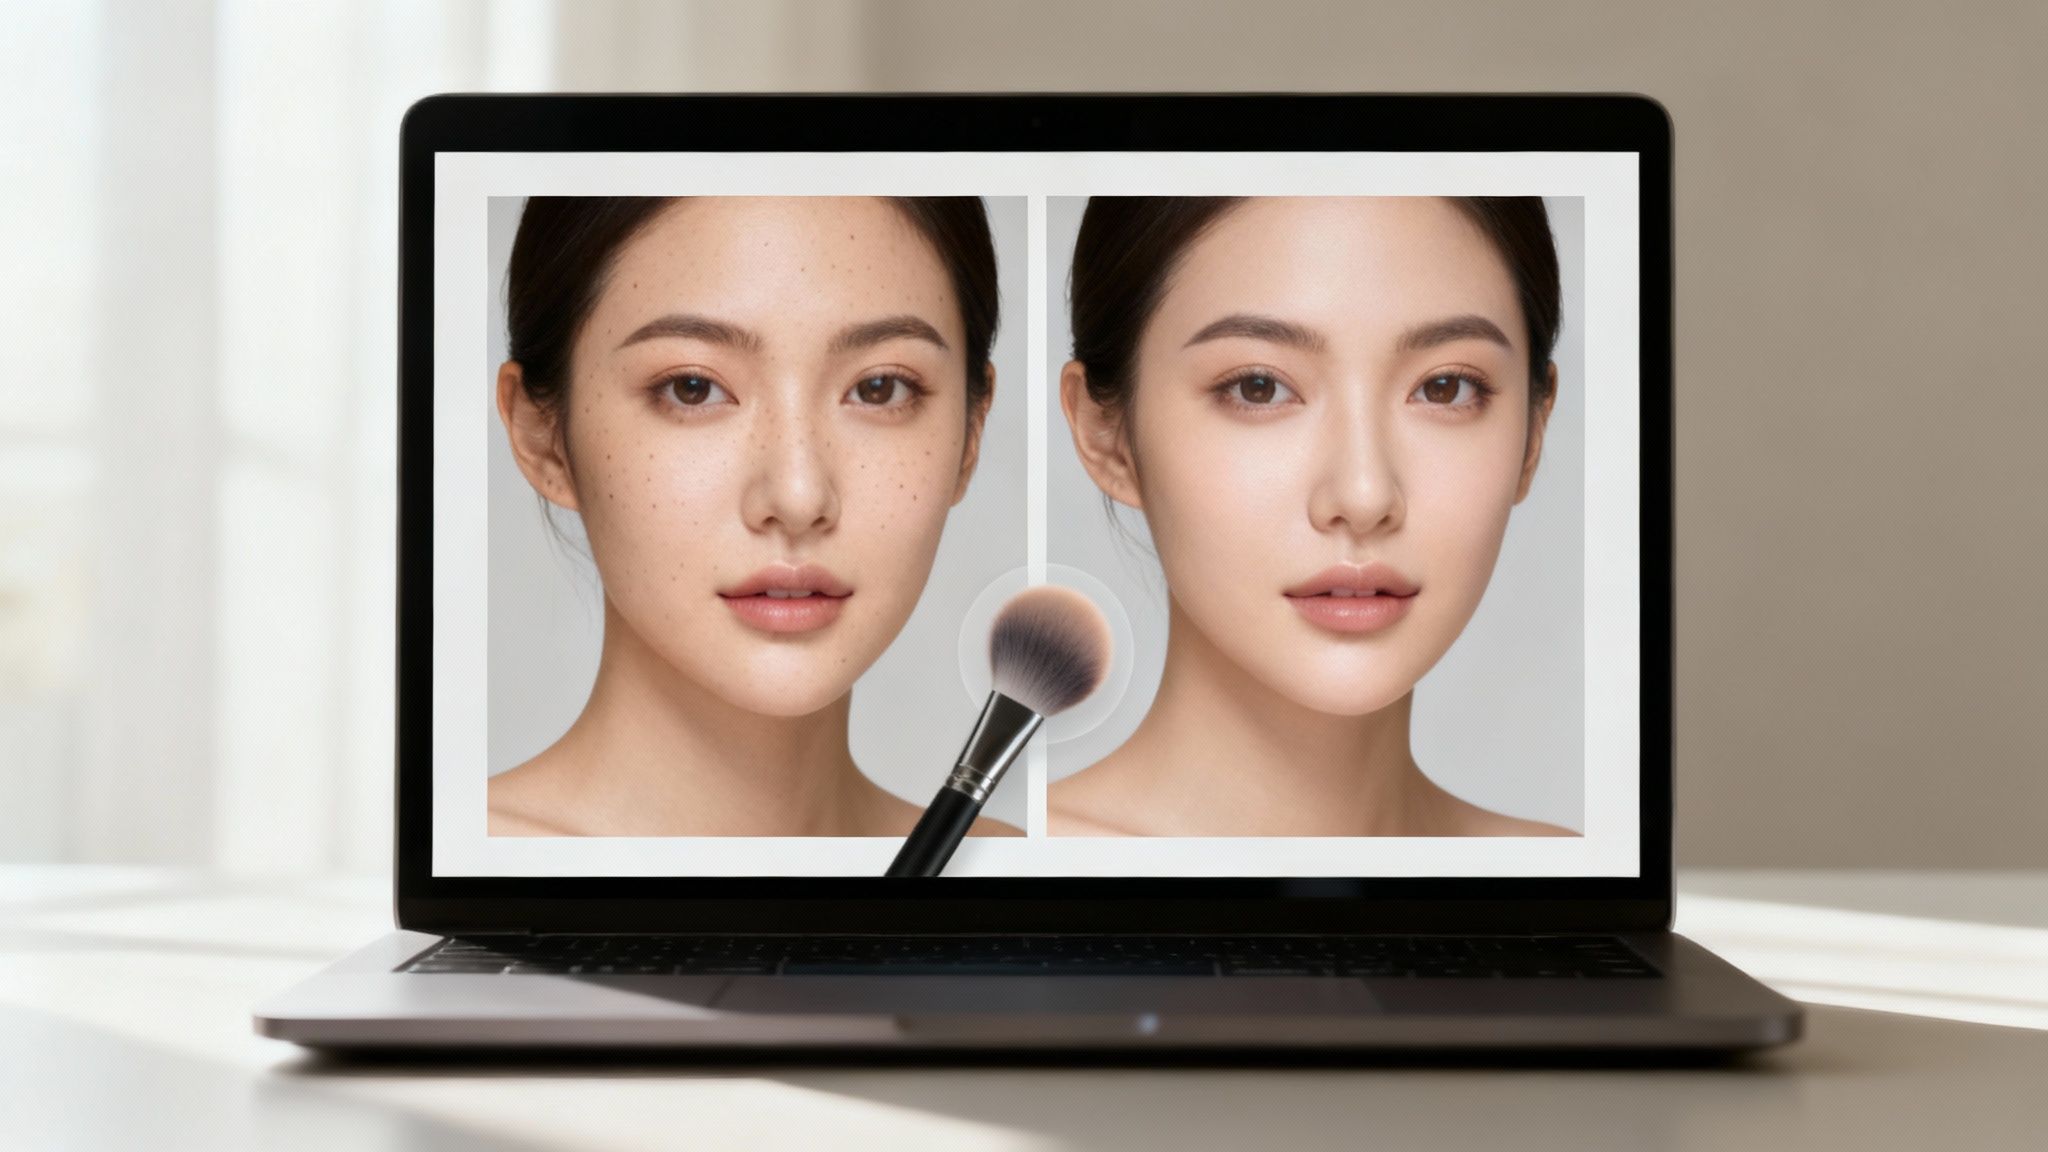
9. Retouching and Blemish Removal
Retouching and blemish removal are precise photo editing techniques focused on cleaning up images by selectively removing imperfections. This process involves using tools like the healing brush, clone stamp, and AI-powered spot removal to eliminate distractions such as acne, wrinkles, dust spots, or even unwanted objects like power lines in a landscape. The goal is to enhance the subject and create a polished, professional final product without appearing unnatural.
Effective retouching is subtle and preserves essential textures. A study on digital image manipulation from Dartmouth College found that viewers react negatively to overly smoothed or "plastic" looking skin, perceiving it as less trustworthy. The key is balance, enhancing beauty by removing temporary blemishes while keeping the subject’s authentic features intact. This technique is indispensable for professional headshots, beauty campaigns, wedding portraits, and product photography.
Mini-Workflow: Natural Skin Retouching
Work Non-Destructively: Always create a new, empty layer for your retouching work. This allows you to make changes without permanently altering the original image.
Use the Spot Healing Brush: For small, isolated blemishes like pimples or sensor dust, the Spot Healing Brush is ideal. Simply click on the imperfection, and the tool will automatically sample surrounding pixels to blend it away.
Apply the Clone Stamp Tool: For larger areas or more complex textures, use the Clone Stamp Tool. Hold Alt/Option to sample a clean source area, then paint over the unwanted element. Adjust the opacity for a more subtle effect.
Zoom and Review: Zoom in to 100% to check your work for seamless blending, but also zoom out frequently to ensure the overall image looks natural and not overworked.
Expert Insight: "The best retouching is invisible," notes celebrity beauty photographer Dani Diamond. "Your goal isn't to create a flawless doll, but the best version of a real person. If someone can immediately tell a photo has been retouched, you've gone too far."
DreamShootAI Application:
Streamline your retouching workflow with powerful, prompt-based edits. Upload your photo to the Photo Edit by prompt tool and give specific instructions.
Prompt Example: "Remove the acne from the subject's forehead and chin in this headshot, keeping the natural skin texture."
Prompt Example: "Subtly soften the wrinkles around the eyes and mouth in this portrait to create a more youthful appearance."
Prompt Example: "Clean up the background by removing the stray power lines from the sky in this landscape photo."
Mastering these retouching and blemish removal photo editing techniques is crucial for anyone looking to produce clean, high-quality images.
10. Perspective Correction and Lens Distortion
Perspective correction is a crucial photo editing technique that rectifies geometric distortions introduced by camera angle, lens choice, and shooting position. It's the key to making buildings stand tall instead of leaning, horizons lie flat, and photos appear structurally sound. This process involves fixing issues like converging vertical lines (keystoning), bulging centers from wide-angle lenses (barrel distortion), or pinched centers from telephoto lenses (pincushion distortion).
A study from the International Journal of Computer Vision highlights how the human visual system is highly sensitive to geometric inconsistencies, making perspective correction vital for perceived quality, especially in architectural and landscape photography. Applying these adjustments ensures that the final image is a true and professional representation of the scene, free from distracting and unnatural warping.
Mini-Workflow: Correcting Perspective
Apply Lens Profile Correction: Start by finding the automatic lens profile correction in your software. This feature reads the image's metadata to identify the camera and lens used and applies a preset fix for known distortion, vignetting, and chromatic aberration.
Straighten the Horizon: Use a straightening tool or a rotate-and-crop function to level any tilted horizons in landscapes or seascapes. Align the tool's guide with the natural horizon line.
Correct Vertical and Horizontal Lines: For architectural shots, use manual perspective controls (often called "Upright," "Transform," or "Guided" tools). Adjust the Vertical slider to make converging lines parallel, ensuring buildings don't look like they are falling backward.
Crop to Finalize: Correcting perspective often warps the image boundaries, leaving blank areas. Crop the photo to create a clean, rectangular frame and remove any empty space.
Expert Insight: "Lens profiles are your first line of defense against distortion. They do 80% of the work automatically," advises architectural photographer Mike Kelley. "Only after applying the profile should you start manual adjustments to fine-tune the geometry for a perfectly polished look."
DreamShootAI Application:
For automated, professional-grade corrections, the Photo Edit by prompt feature simplifies this technical process. Upload your image and let AI handle the complex geometry.
Prompt Example: "Straighten the leaning buildings in this city photo and make all the vertical lines parallel."
Prompt Example: "Correct the fisheye effect from my wide-angle lens in this interior real estate shot and straighten the horizon line."
This technique is indispensable for professional real estate photos, majestic travel shots of architecture, and any image where straight lines and accurate proportions are paramount.
⭐⭐⭐ / 📊 Improves framing and focus; reduces pixels if extreme
Social media crops, composition fixes, storytelling
Consider final output size; keep original file
Sharpening and Detail Enhancement
🔄🔄 Medium — masks, radius/amount controls
⚡⚡ Quick — apply after edits
⭐⭐⭐⭐ / 📊 Enhances perceived sharpness and texture
Landscapes, wildlife, macro, fashion detail work
Sharpen last; use masking and subtle amounts
Saturation and Vibrance Adjustment
🔄🔄 Low–Medium — HSL and vibrance controls
⚡⚡⚡ Quick — global or selective tweaks
⭐⭐⭐⭐ / 📊 Strong mood impact; protects skin when careful
Travel, lifestyle, cinematic grading, product
Prefer vibrance for skin; use HSL for targeted color
Dodge and Burn
🔄🔄🔄 High — local painting, masks, feathering
⚡ Slow — time‑intensive, precision work
⭐⭐⭐⭐ / 📊 Improves dimensionality and viewer focus
Portrait beauty, enhancing highlights/shadows, drama
Use low‑exposure brushes and multiple passes
Noise Reduction and Clarity
🔄🔄 Medium — luminance/chroma, AI options
⚡⚡ Moderate — process time can vary
⭐⭐⭐⭐ / 📊 Cleans high‑ISO images while preserving detail
Low‑light, event, astrophotography, restoration
Denoise before sharpening; check at 100% zoom
Selective Color Grading and Color Ranges
🔄🔄🔄 High — HSL, curves, split‑toning, LUTs
⚡ Slow — iterative and stylistic work
⭐⭐⭐⭐⭐ / 📊 Creates cohesive, cinematic or brand styles
Editorial, commercial, cinematic projects, series grading
Build LUTs/presets and use reference images
Retouching and Blemish Removal
🔄🔄🔄 High — healing, clone, content‑aware, AI
⚡ Slow — can be very time‑consuming
⭐⭐⭐⭐ / 📊 Produces polished, professional results when subtle
Beauty, fashion, portraits, product cleanup
Work non‑destructively; zoom to 100% and be subtle
Perspective Correction and Lens Distortion
🔄🔄 Medium — transforms, lens profiles
⚡⚡ Moderate — apply early in workflow
⭐⭐⭐⭐ / 📊 Fixes geometric errors; essential for architectural accuracy
Architecture, real estate, wide‑angle landscapes
Apply before other edits; match exact lens profile
Your Next Step in Creative Photo Editing
You have now journeyed through ten foundational photo editing techniques that form the bedrock of compelling visual storytelling. From mastering the fundamentals of Exposure and Levels to the nuanced artistry of Dodge and Burn and Selective Color Grading, each technique is a powerful tool in its own right. Yet, their true power is unlocked when they are combined, layered, and applied with a clear creative vision. The goal is not just to "fix" an image but to elevate it, to guide the viewer's eye, and to evoke a specific emotion that the original capture only hinted at.
This comprehensive exploration demonstrates that professional-level editing is a process of deliberate, incremental adjustments. It's about understanding that a subtle tweak in White Balance can change the entire mood of a portrait, or how a precise crop can transform a mundane snapshot into a dynamic composition. Mastering these skills is what separates a good photograph from an unforgettable one.
From Technical Skill to Creative Mastery
The true value of these photo editing techniques lies in their ability to bridge the gap between the image you captured and the one you envisioned. As famed landscape photographer Ansel Adams once said, "You don't take a photograph, you make it." Editing is an integral part of that "making" process. It's where your artistic voice finds its final expression.
Consider the journey from a raw, unprocessed file to a finished masterpiece:
Correction: The initial steps, like adjusting exposure and correcting lens distortion, establish a clean, accurate canvas.
Enhancement: Techniques like sharpening, saturation adjustments, and noise reduction build upon that foundation, adding clarity and impact.
Artistry: Finally, advanced methods such as color grading and local adjustments with Dodge and Burn infuse the image with your unique style and emotional intent.
This progression from technical correction to creative artistry is the path every great photographer walks. The key takeaway is that these techniques are not isolated tricks; they are interconnected elements of a holistic workflow.
The AI Revolution in Photo Editing
The evolution of photo editing is accelerating. The painstaking manual processes that once took hours can now be accomplished in seconds with the right tools. According to a 2023 market analysis by Grand View Research, the global AI in photography and editing market is projected to grow at a compound annual growth rate (CAGR) of 16.5% from 2023 to 2030, indicating a major shift in how creators approach their work. Platforms like DreamShootAI are at the forefront of this transformation, democratizing access to high-end results.
Instead of navigating complex sliders and layers for blemish removal, a simple prompt like "remove the small scar on the left cheek and even out the skin tone" can achieve flawless results instantly. This shift doesn't make the foundational knowledge obsolete; it enhances it. Understanding why you need to dodge and burn allows you to write more effective prompts and better evaluate the AI's output, giving you more creative control, not less. For professionals and influencers, this efficiency is a game-changer. The time saved on tedious edits can be reinvested into creative strategy and improving social media engagement by producing higher-quality content more frequently.
Ultimately, mastering these ten photo editing techniques provides you with a versatile and powerful creative language. Whether you are using traditional software or leveraging the speed of AI, this knowledge empowers you to transform any image, tell compelling stories, and bring your unique creative vision to life. The journey of a thousand edits begins with a single adjustment, so open your favorite photo and start practicing today.
Ready to apply these advanced techniques with unparalleled speed and ease? DreamShootAI translates your creative vision into stunning reality using simple text prompts. Stop wrestling with complicated software and start creating with the power of AI by visiting DreamShootAI to transform your photos today.